

Watch this video to find out how you can create your own extra fields in SuperOffice CRM (video length - 2:51)
Steps
- Go to Settings and maintenance > Fields. Then select the required tab: Company, Contact, Project, Sale, Follow-up, or Document.
- Click the Add button below the Fields list.
-
Enter a Name and select a Type (for example number, text, or date).
Use a language prefix to specify the name in multiple languages like this:
US:"Language";NO:"Språk"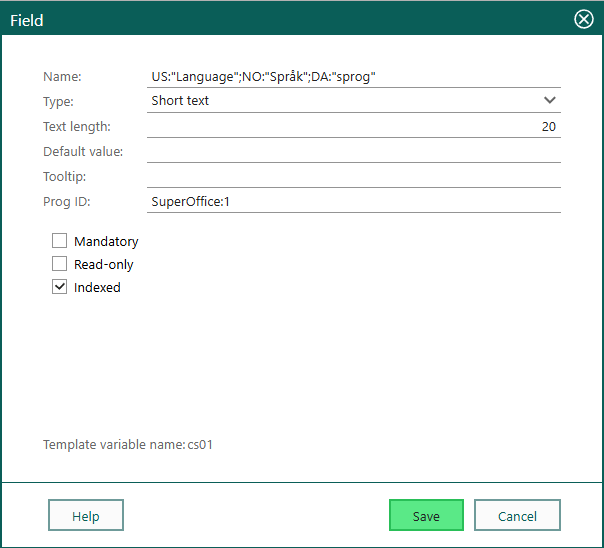
- Optionally set other field properties, such as whether the field is mandatory or should be indexed.
- When you are done, click Save. The dialog closes and the new field is displayed in the Fields list and in the grid.
- Optionally, adjust the position of the field. This requires the Development Tools license or the Core plan.
- Continue adding fields. Click Publish when you are done to make the field available to SuperOffice users. Unpublished fields and fields with unpublished changes are displayed in bold text in the Fields list.
Field properties
You cannot check Read only if you checked Mandatory. These options are mutually exclusive.
Making a field mandatory? Make sure it has somewhere to live.If the More tab has been removed in Screen Designer, a newly-mandatory field
may have no place to appear on the screen. When that happens, users can’t save
new records — and the disabled Save button won’t clearly explain why.Before marking a field as mandatory, open Screen Designer for the affected
entity and confirm the field is visible on a tab that users can actually reach.