

Summary of highlights
SuperOffice 12 - a new main version of SuperOffice CRM where we focus on AI to become part of how you work every day. From this version, all feature updates are available to SuperOffice Online customers only. Onsite installations will receive security updates only.Feature updates
Settings and maintenance Multiple DKIM for Mailgun
Send outgoing mail in Service and Marketing from several domains - such as separate brands or country-specific addresses - with each domain signed by its own DKIM key, instead of sharing one key across your SuperOffice environment.Without multiple DKIM, all outgoing mail is signed with a single domain’s DKIM key, even when it is sent from a different brand or country-specific address. This weakens DKIM and DMARC verification for any domain other than the one the key belongs to, which can affect deliverability.To set this up, request a DKIM setup for each sending domain using the Order DKIM key form, listing the domains involved - for example brand1.com, brand2.com, and brand3.no. SuperOffice Operations will create the domains in Mailgun, generate a DKIM key for each one, and send you the DNS records to add. Your DNS administrator adds these records following the DKIM and SPF setup guides. Once SuperOffice Operations confirms the records are valid, the domain is ready to use.Remember to add the different domains in Settings and maintenance > Lists > Mailing domains, and add your different mailboxes in Settings and maintenance > Requests > E-mail.
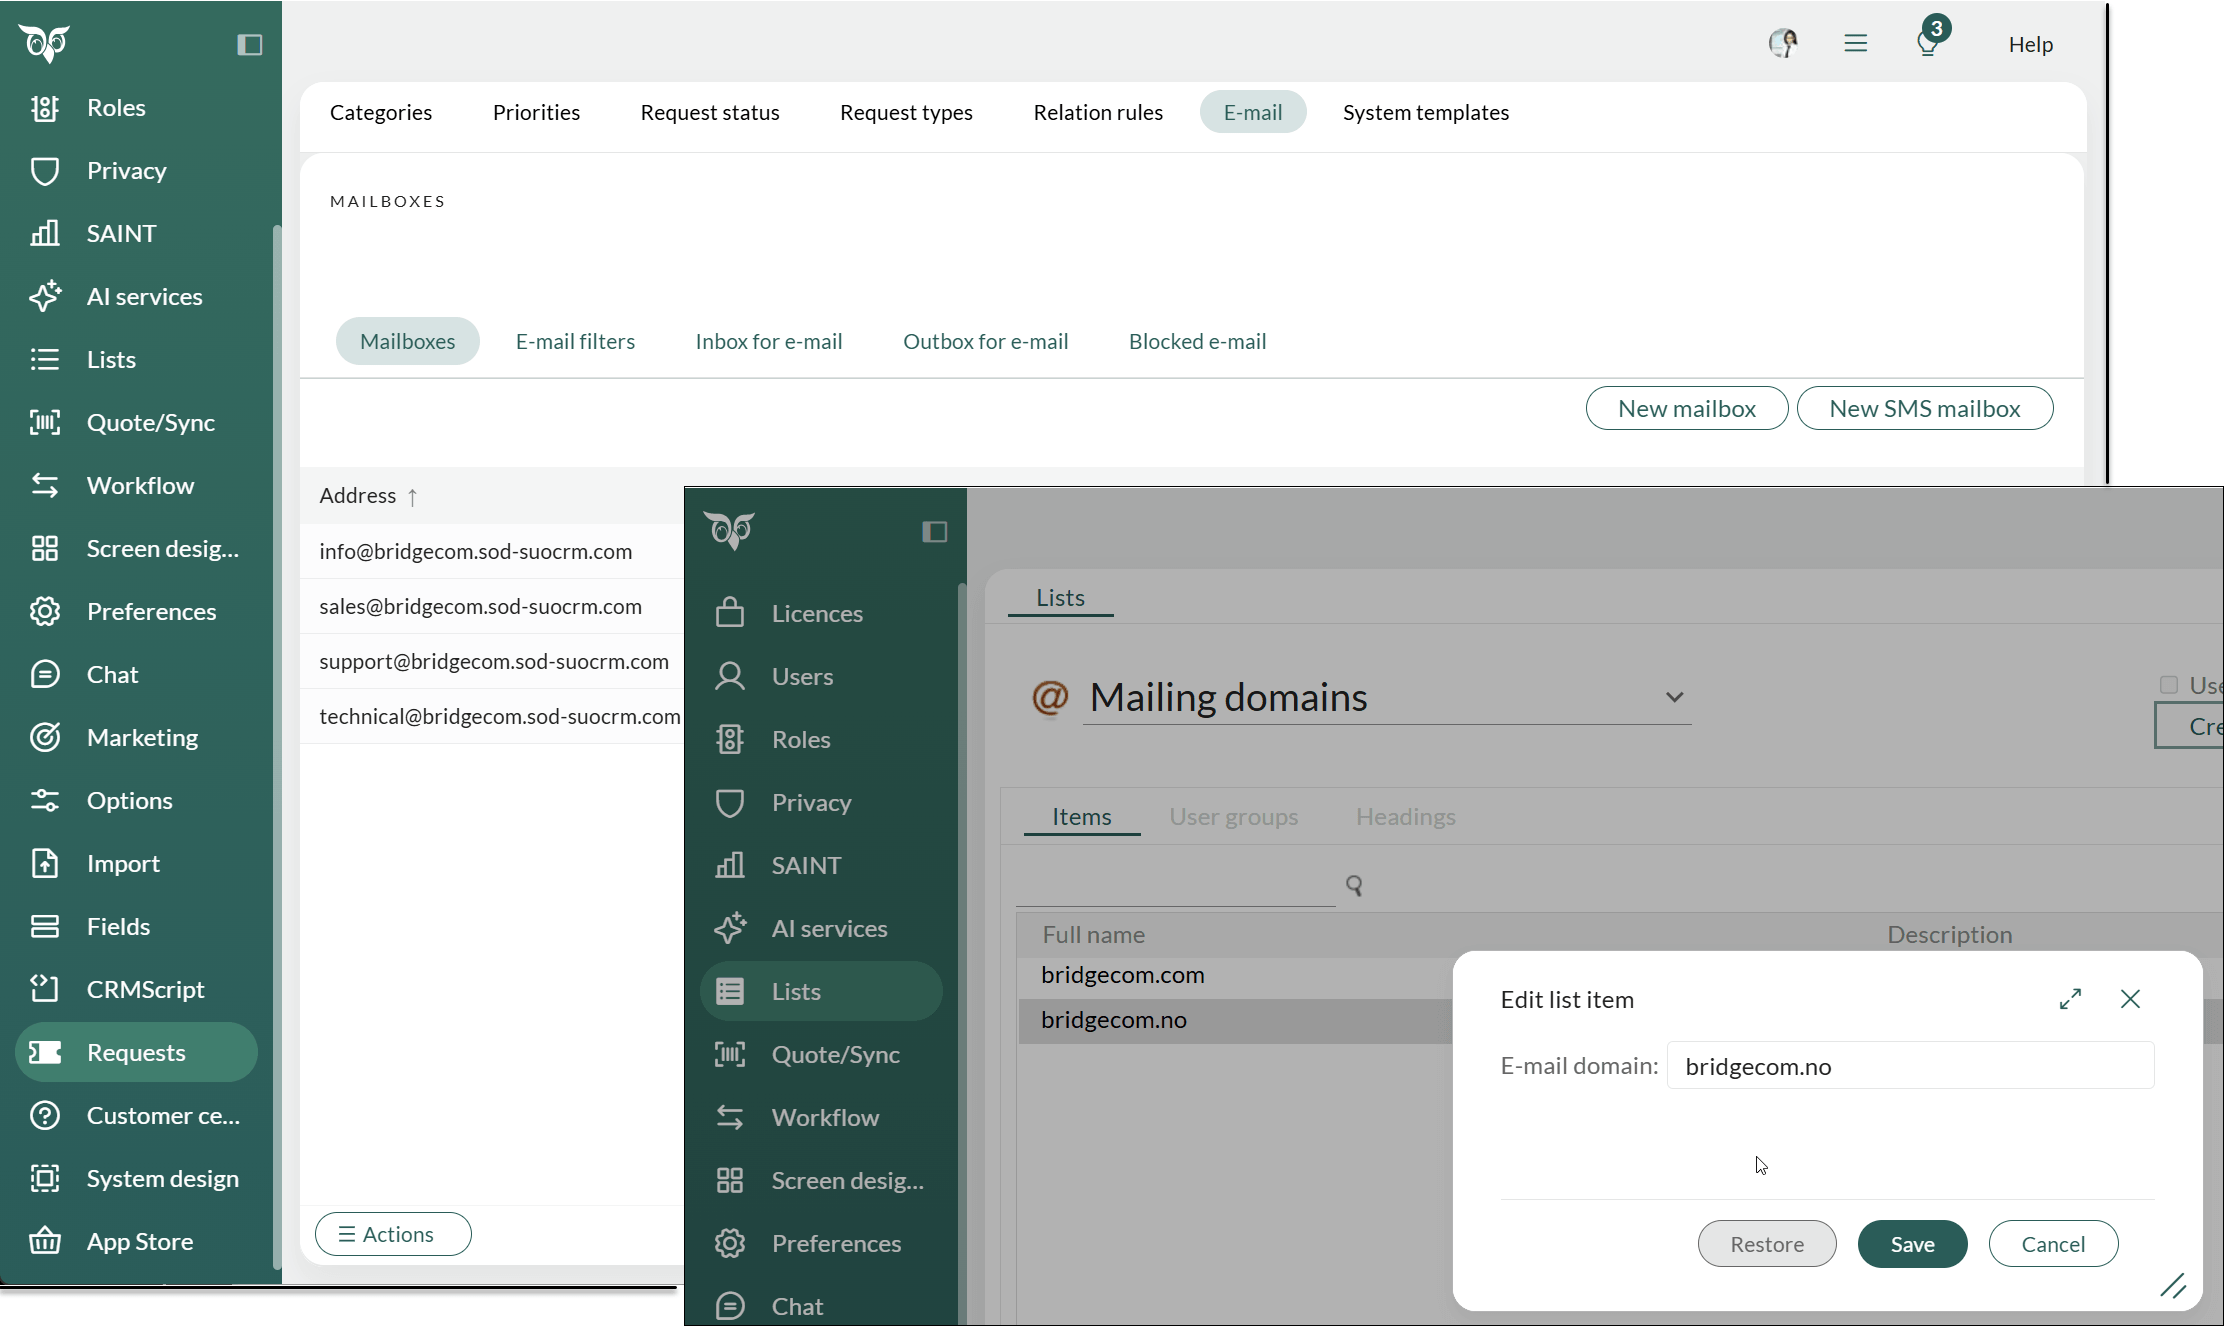 Learn more about multiple DKIM records.
Core CRM Dashboard - Measure sale cycles
Understanding how long deals take to close helps you spot what’s working and where deals stall. The Sale cycle field shows the number of days from when a sale is created until it’s set to Sold or Lost - the count appears once the sale reaches one of these statuses, rather than running while it’s still open. For open sales, use the Days in stage field instead.Without this, tracking cycle length across reps, teams, and segments means piecing information together by hand. The Sale cycle field puts this on the dashboard, so the pattern is visible at a glance rather than something you have to dig for.You’ll find it in the Dashboard module, as a filter in Find, and as a column in archives.Two ready-made tile templates in the Library make it easy to get started:- My average sale cycle per sale type this and previous year
- My group’s average sale cycle per sale type this and previous year
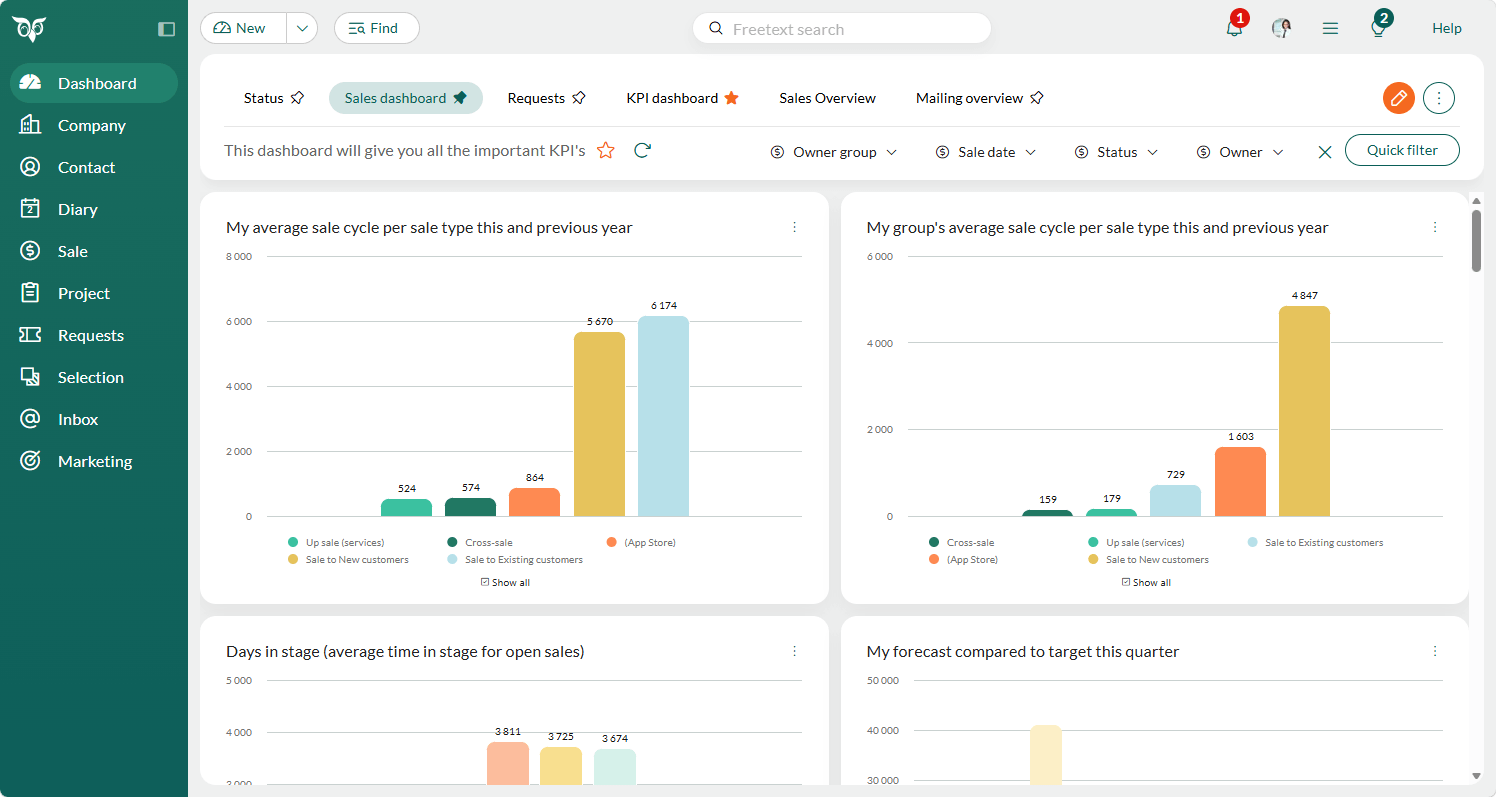

Find - Sale cycle as criteria and column
The Sale cycle criteria and column let you see how long a sale has been open. Because the field shows a number of days, you can search between, above, or below any figure you choose.Adding Sale cycle as a column in your sale selections gives you a quick view of how long each sale has been in progress, right alongside the rest of your results.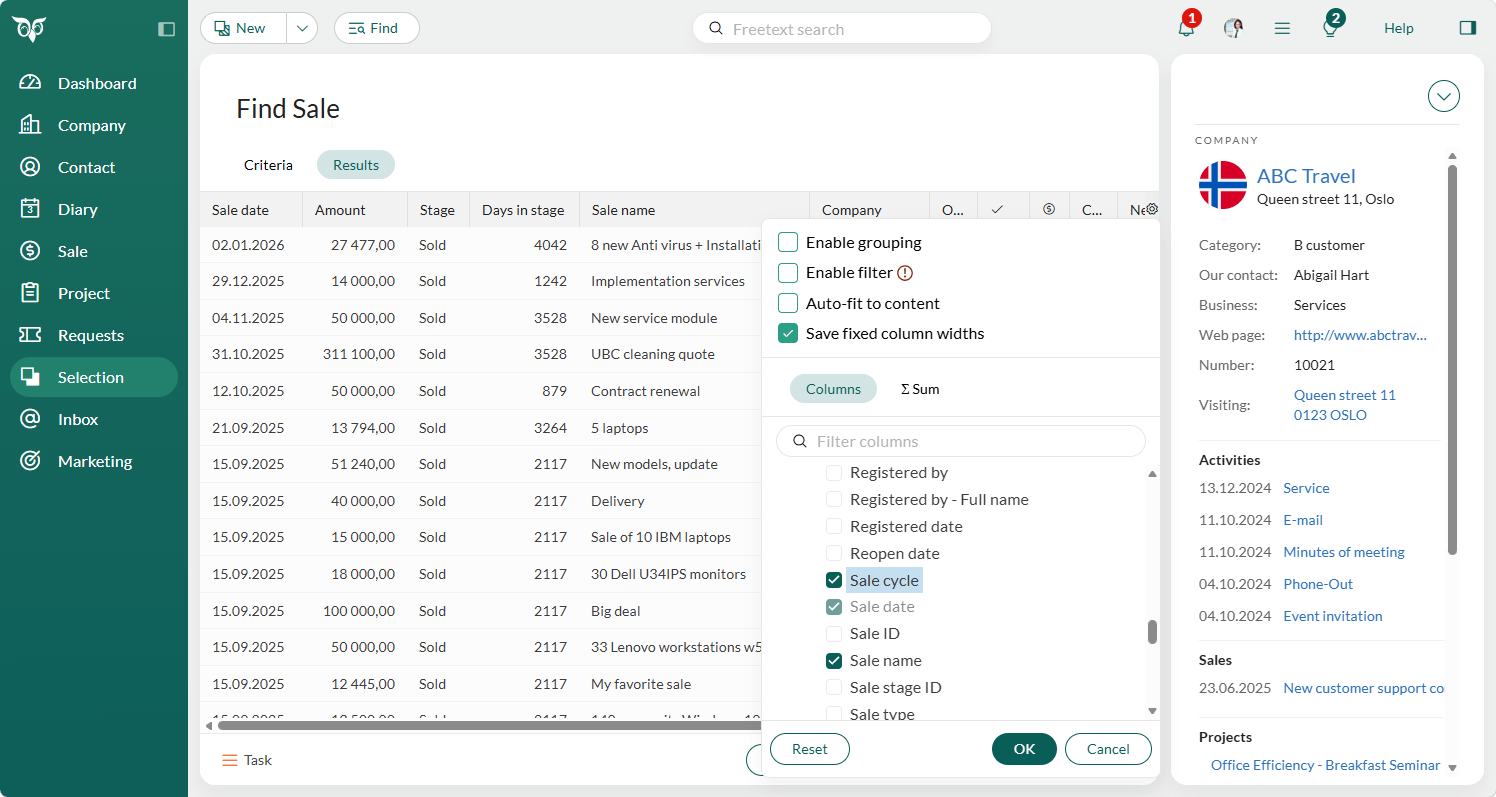
The Sale cycle shows 0 days until the sale is set to Sold or Lost. For open sales, use the Days in stage field instead.
Core CRM Email and Document - Download the email or document file
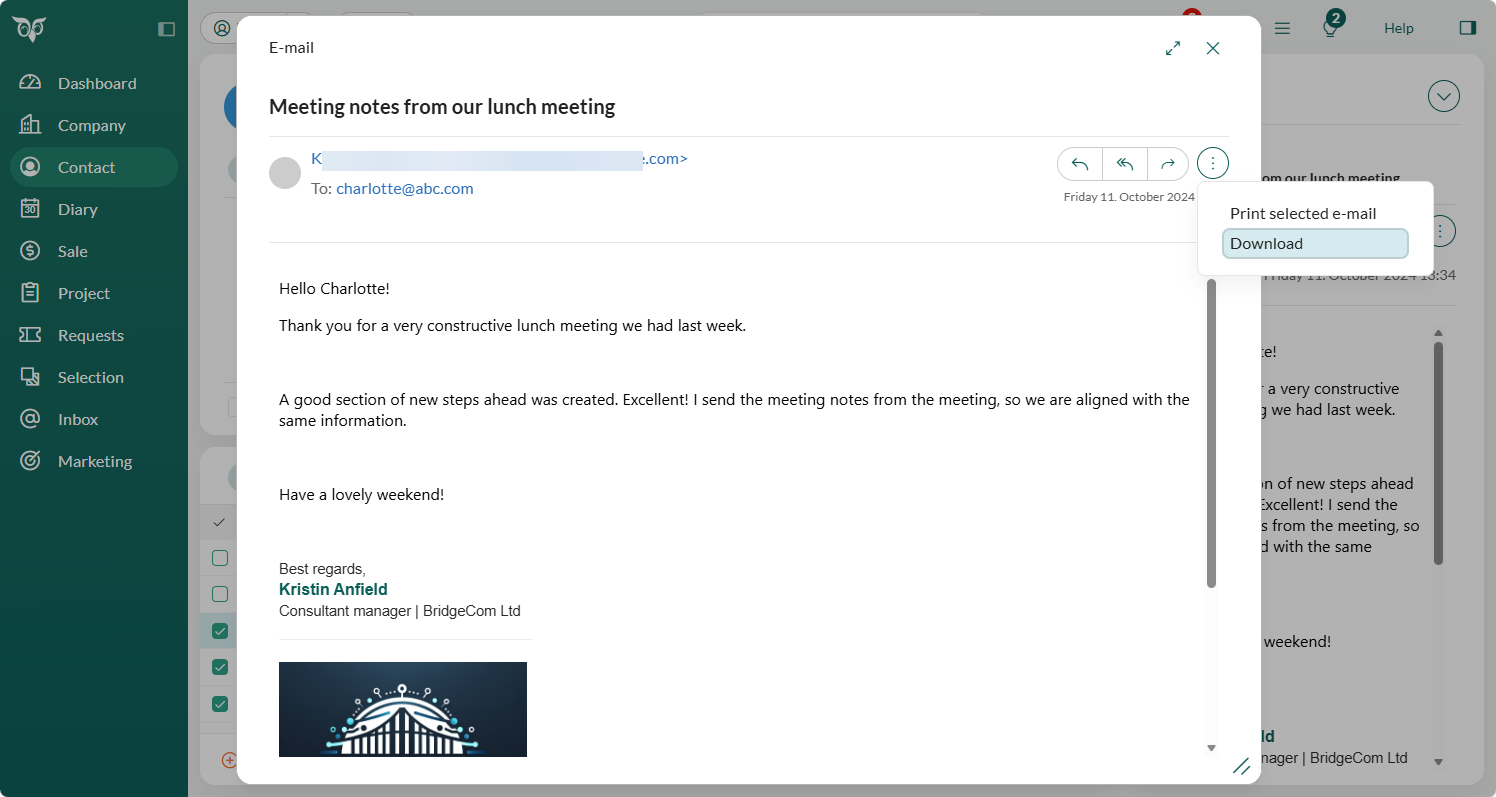
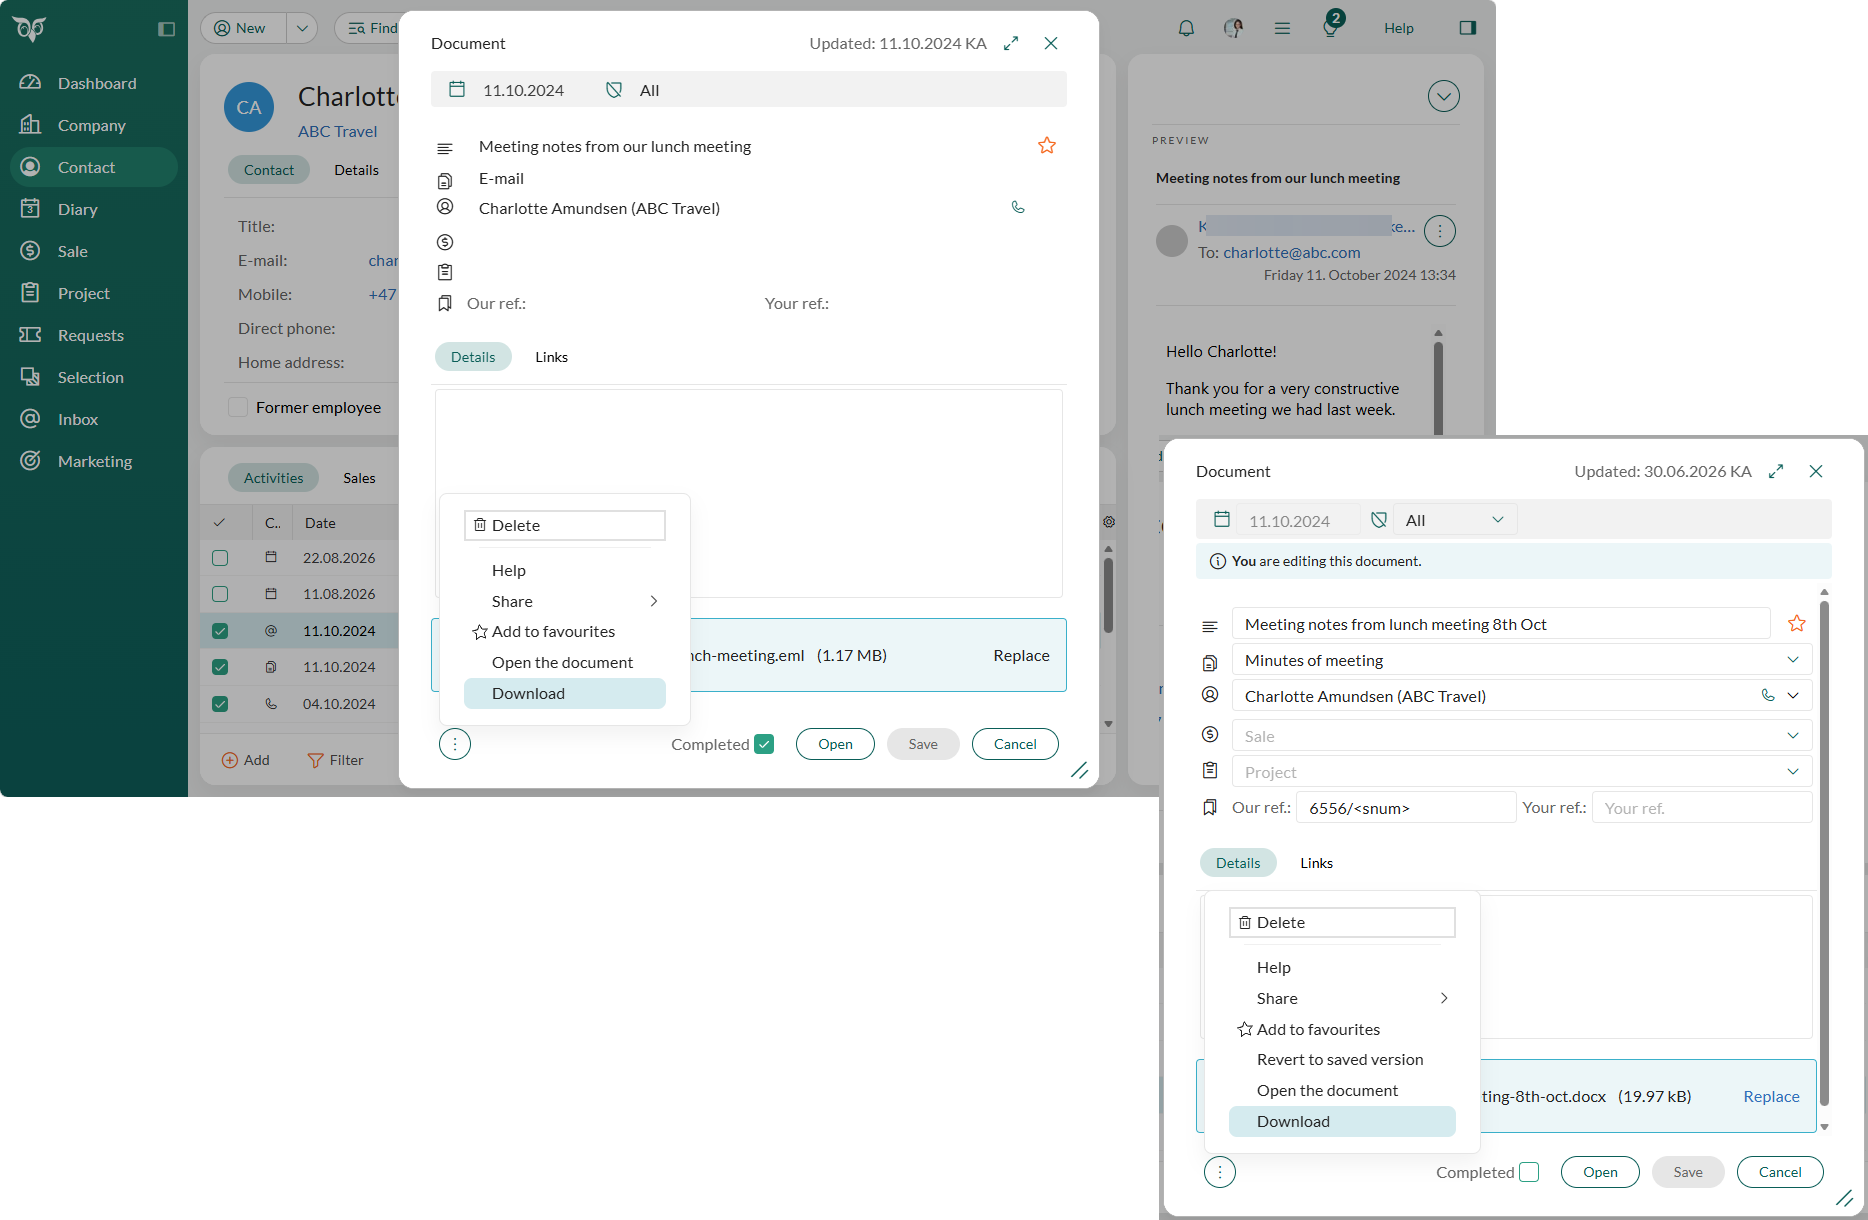
Sometimes you need a copy of an email or document outside SuperOffice - to forward it another way, archive it locally, or open it in a different tool. You can now download the email or document file from any archive where you see it, and from the document dialog.Downloading an email lets you open the stored message in your local email client. As Outlook Mail Link (OML) is phased out, this gives you a straightforward way to keep working with emails in your local Outlook installation.In any archive that shows documents and emails, the context menu includes a Download option. Multi-select isn’t supported.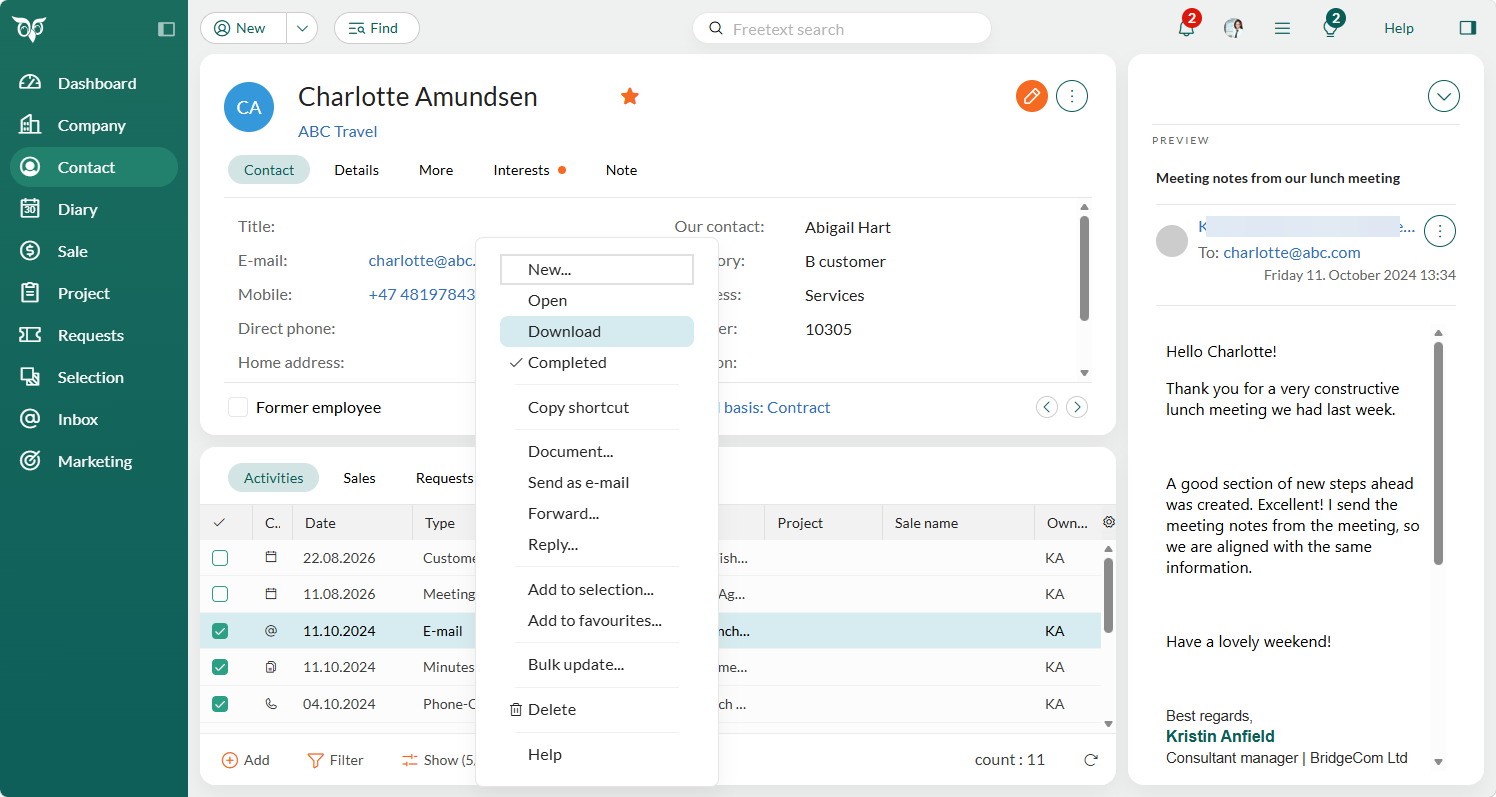 Opening an email inside SuperOffice shows the Download option in the Task menu.
 An email in the Inbox also has the Download option in the Task menu.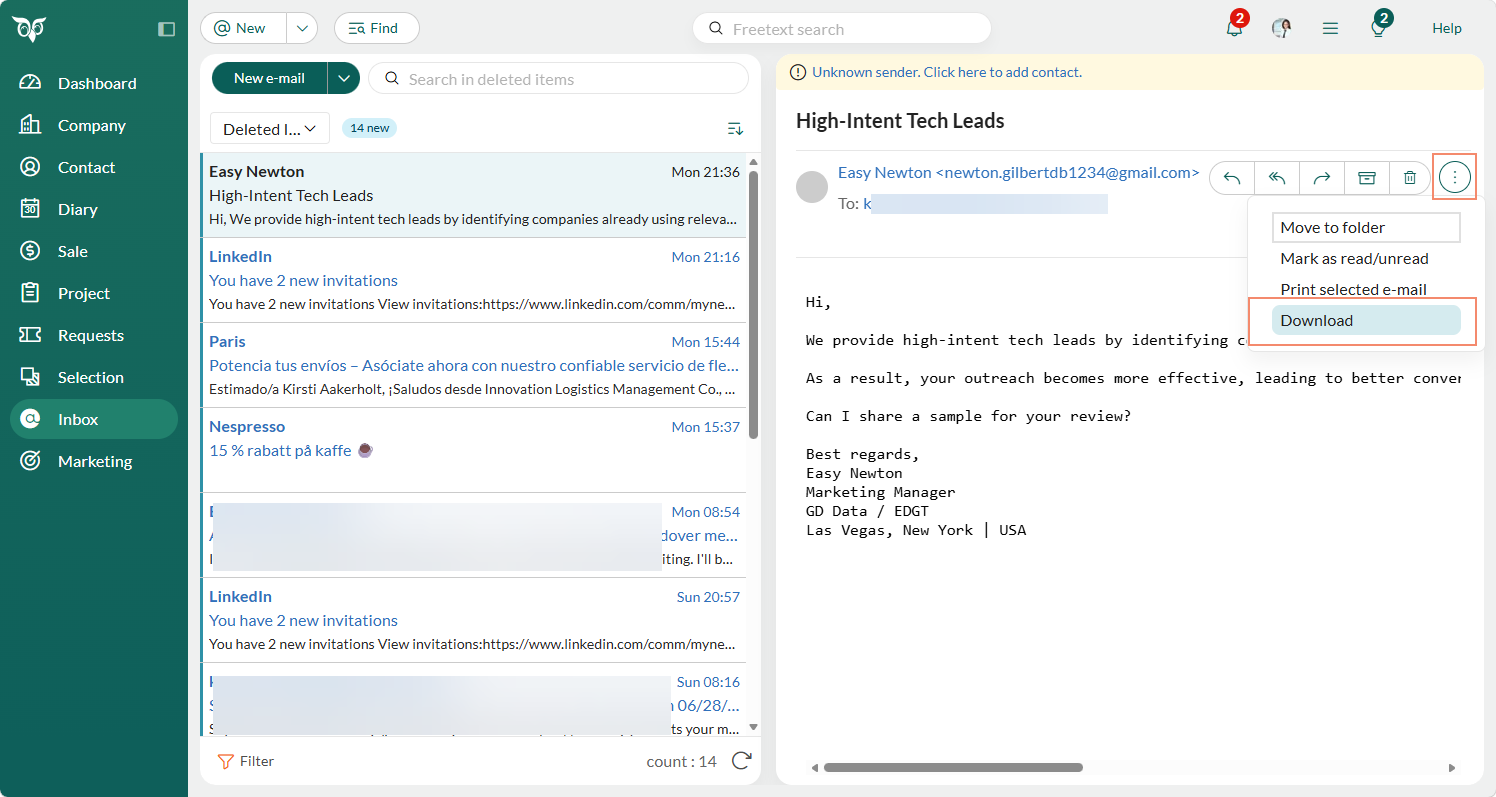
Marketing Mailing - View numbers with two decimal in Summary
A mailing’s Open rate and Click-through rate are shown to two decimal places, giving an exact read on how recipients responded rather than a rounded approximation.Rounding these rates to the nearest whole percentage can hide real differences in performance, especially for smaller mailings where each recipient shifts the percentage by several points. Showing the full two decimal places removes that ambiguity, so the number on screen matches the actual count of opens and clicks.Find these figures on the Summary tab of a mailing, under Marketing > Mailings.Both rates are calculated as a percentage of the number of recipients the mailing was sent to. For a mailing sent to seven recipients, five opens is shown as an Open rate of 71.43%, and two clicks is shown as a Click-through rate of 28.57%. Learn more about mailing reports.
Settings and maintenance System design - Webhooks management panel
The Webhooks panel gives administrators a visual way to manage, monitor, and recover webhooks without writing code or using the API.Go to Settings and maintenance > System design > Webhooks to see all configured webhooks in a sortable, filterable overview. Each row shows the webhook name, health status, target, subscribed events, last delivery time, last event, and consecutive errors for the last 24 hours.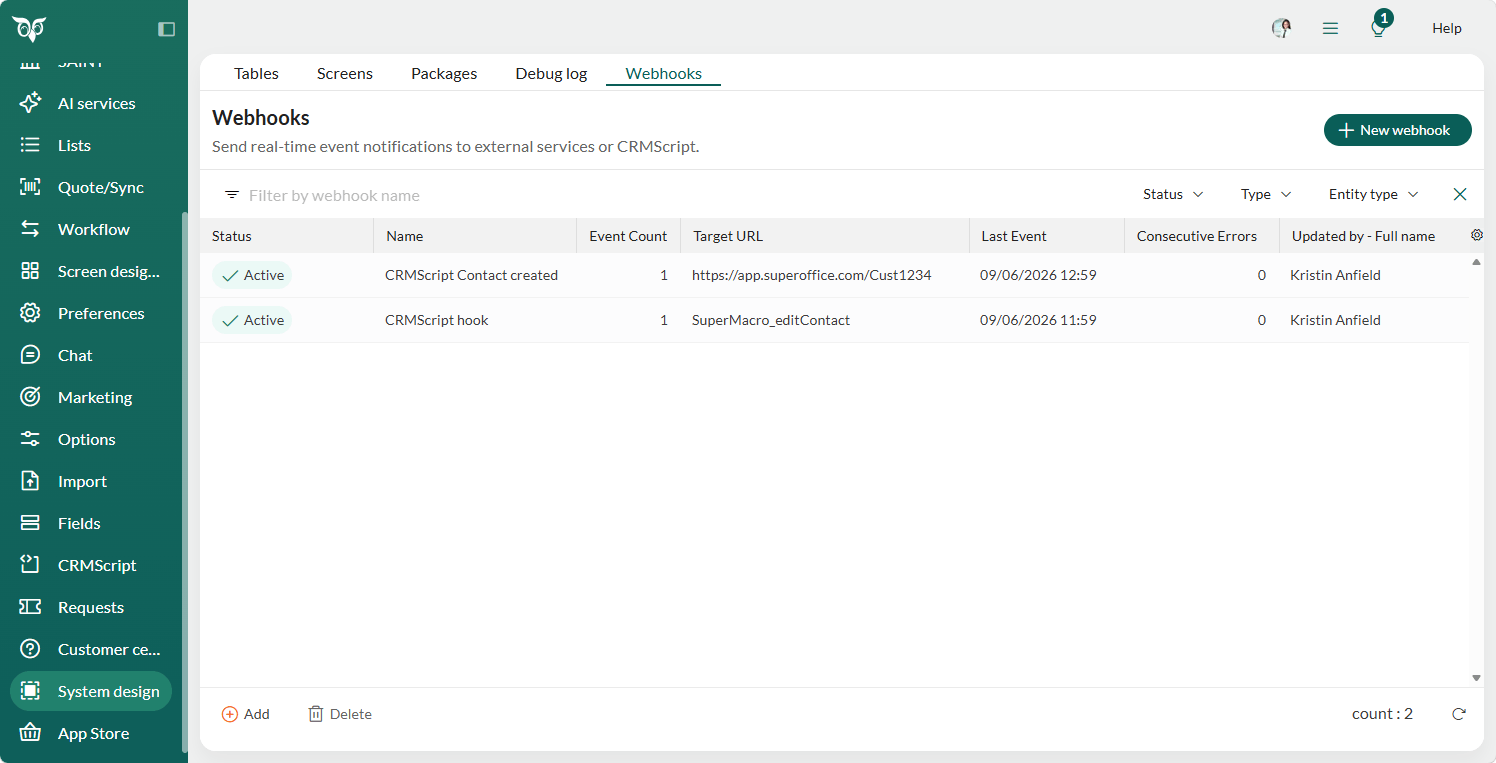 Health status is color-coded: green for healthy, amber for active with failures, grey for manually stopped, and red for automatically deactivated.To create and edit webhooks you get a guided form. Select the events to subscribe to by entity type, set the destination as an external HTTPS URL or a CRMScript, and test the connection inline before saving. A primary error notification email address is required - the form cannot be submitted without one. Additional CRM users (in your company) and external email addresses can be added as recipients, and you can choose whether to be notified by email, in-app, or both.The context menu gives you options to edit, copy, toggle the active/stopped state, restart, or delete a webhook. Copying a webhook creates a duplicate with a “(copy)” suffix in stopped state.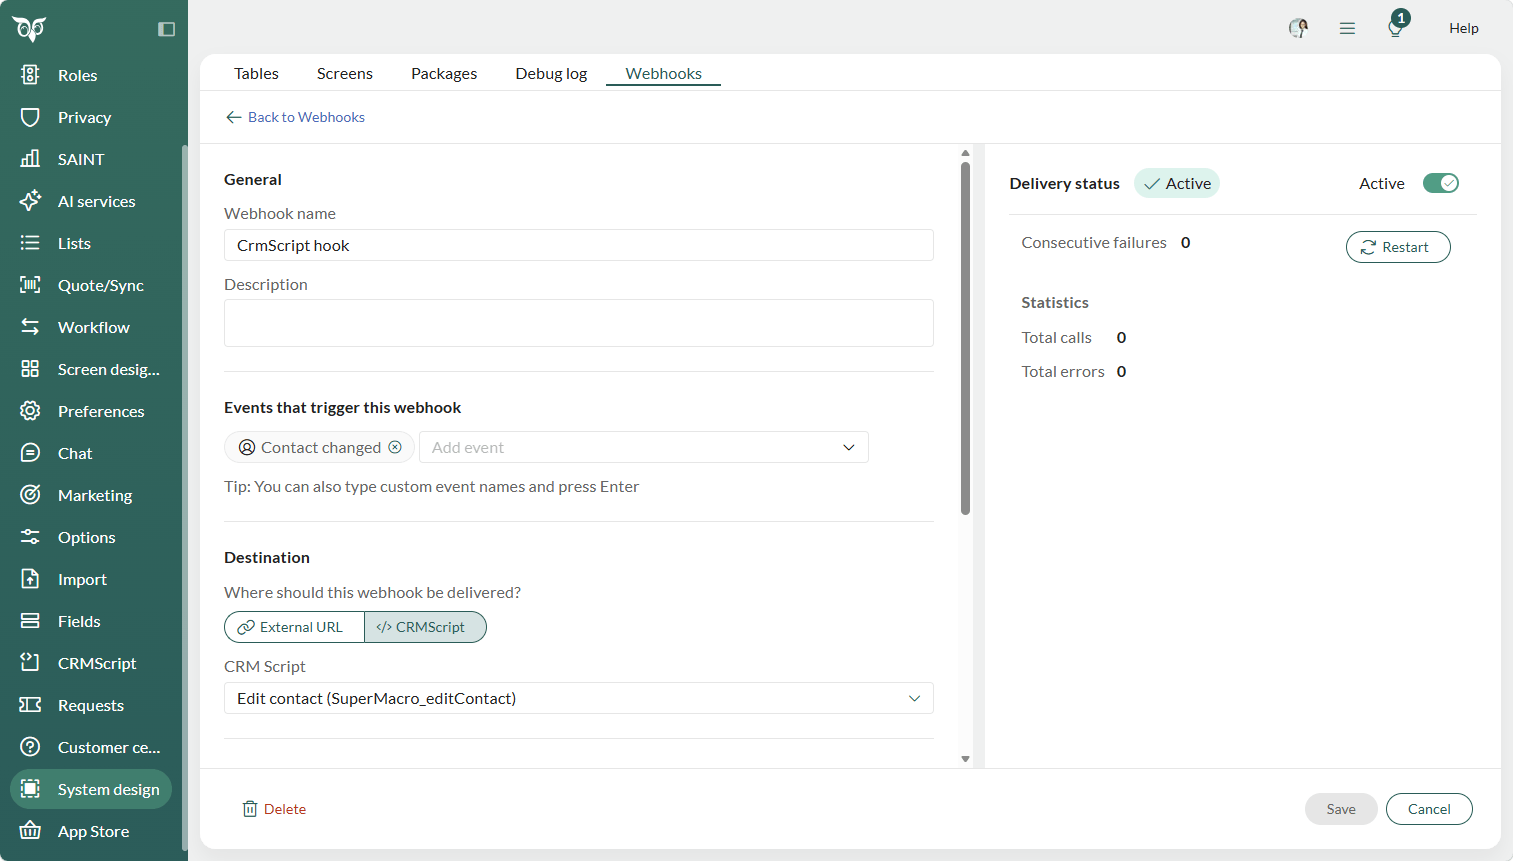
After 9 consecutive delivery failures, the system automatically deactivates the webhook. A red banner on the webhook shows the failure count and last error in plain language. Use the Restart button to re-enable it.
Service Spam classification on requests
The Mark as Spam action lets users classify fraudulent or unwanted requests. Spam requests are excluded from all views, searches, reports, and selections.You’ll see Mark as Spam in the context menu for requests in your lists, in the Task menu on one request, and in the Task menu on request selections.Once you select Mark as Spam, a confirmation dialog (Yes/No) appears to confirm that you want to set the request(s) as spam.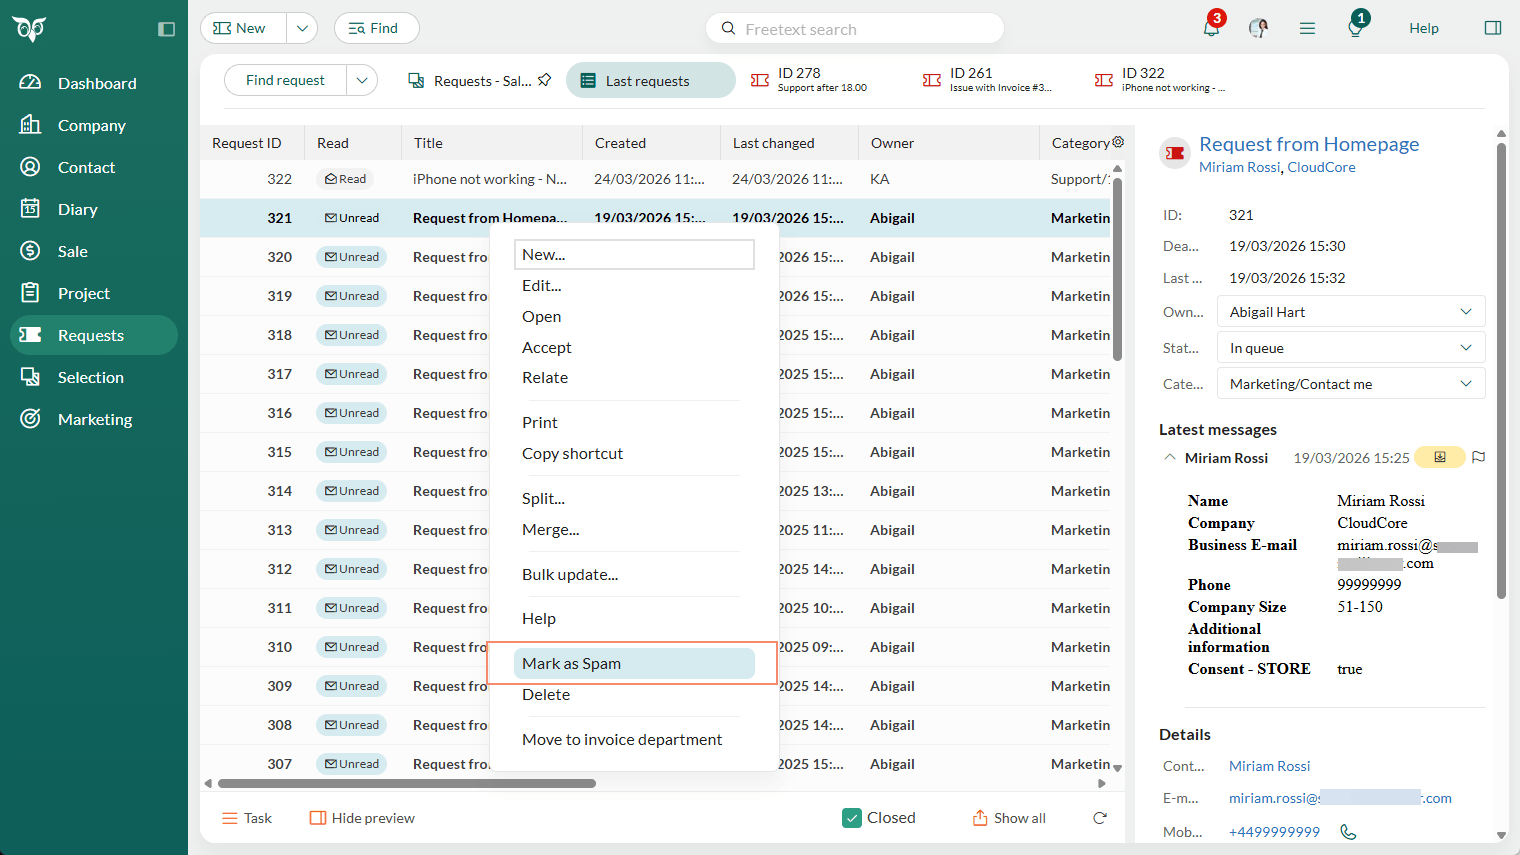
- Only users with the Can mark requests as SPAM functional right can classify requests. The right is configured by an administrator per role in Settings and maintenance.
- Requests marked as spam move to the Recycle bin, where you can restore them if needed. Find the Recycle bin in your Personal settings menu.
- The spam requests are permanently deleted from the Recycle bin after a configurable period. The default is 14 days.